
Roblox Studio is a powerful game development platform that lets you create, publish, and monetize games on Roblox. Whether you’re a complete beginner or have some experience, this guide will help you understand everything from the basic interface to advanced programming concepts.
Getting started with Roblox Studio is completely free. You can download it from create.roblox.com and begin creating immediately. The platform supports multiple programming languages, but primarily uses Luau, a fast and safe scripting language derived from Lua 5.1.
Table Of Contents
Getting Started: Your First Steps
Downloading and Installing Roblox Studio
To begin your journey, head to create.roblox.com and click “Start Creating”. This will prompt you to download Roblox Studio. The installation process is straightforward, just like any other software installation on your computer.
Once installed, open Roblox Studio. You’ll see a startup screen with various templates. For beginners, it’s best to start with the “Baseplate” template. This gives you a clean slate to work with – just a simple gray platform where you can start building.
New to Roblox entirely? Start with our complete beginner’s guide before diving into Studio
Understanding the Interface
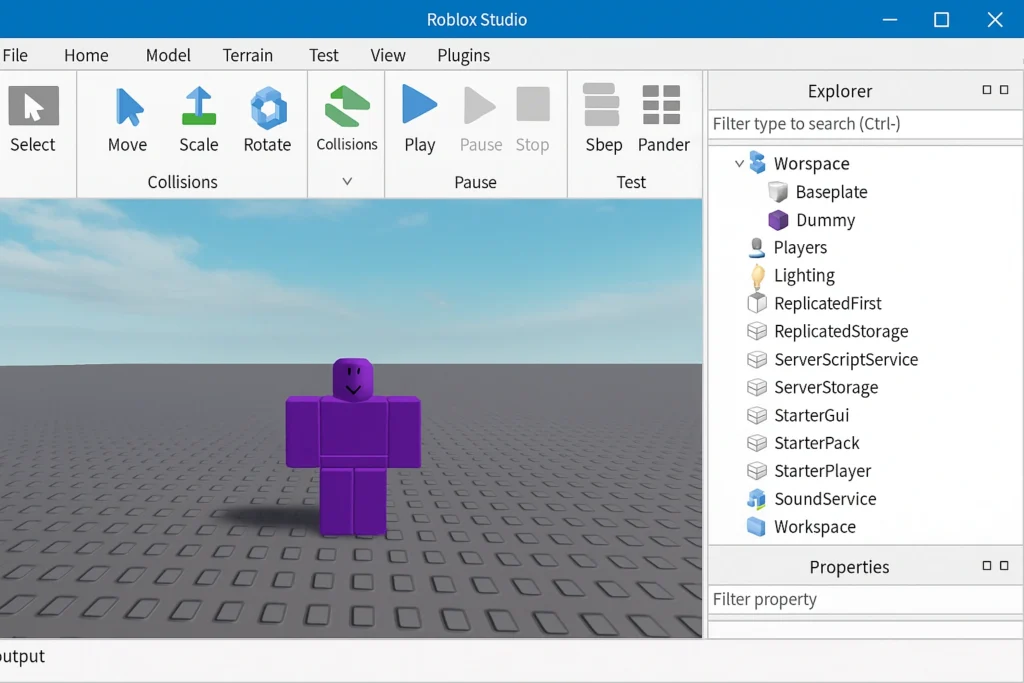
Roblox Studio’s interface might seem overwhelming at first, but it’s actually quite logical once you understand the main components:
The 3D Viewport: This is your main workspace where you’ll see your game world. You can move around using WASD keys, and use your mouse to look around.
The Toolbar: Located at the top, this contains all the tools you need for building and testing your game.
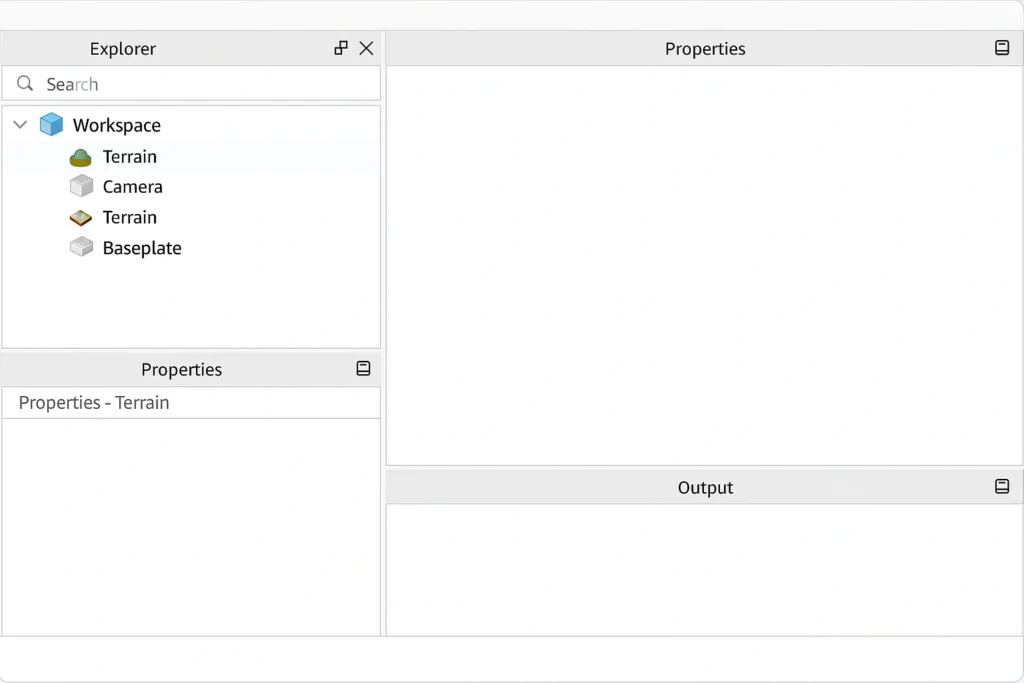
Explorer Window: Shows all the objects in your game in a tree-like structure. If you can’t see it, go to View > Explorer7.
Properties Window: Shows the settings for whatever object you have selected.
Output Window: This is where you’ll see messages from your scripts and any errors that occur.
Building Your First Game
Creating Basic Structures
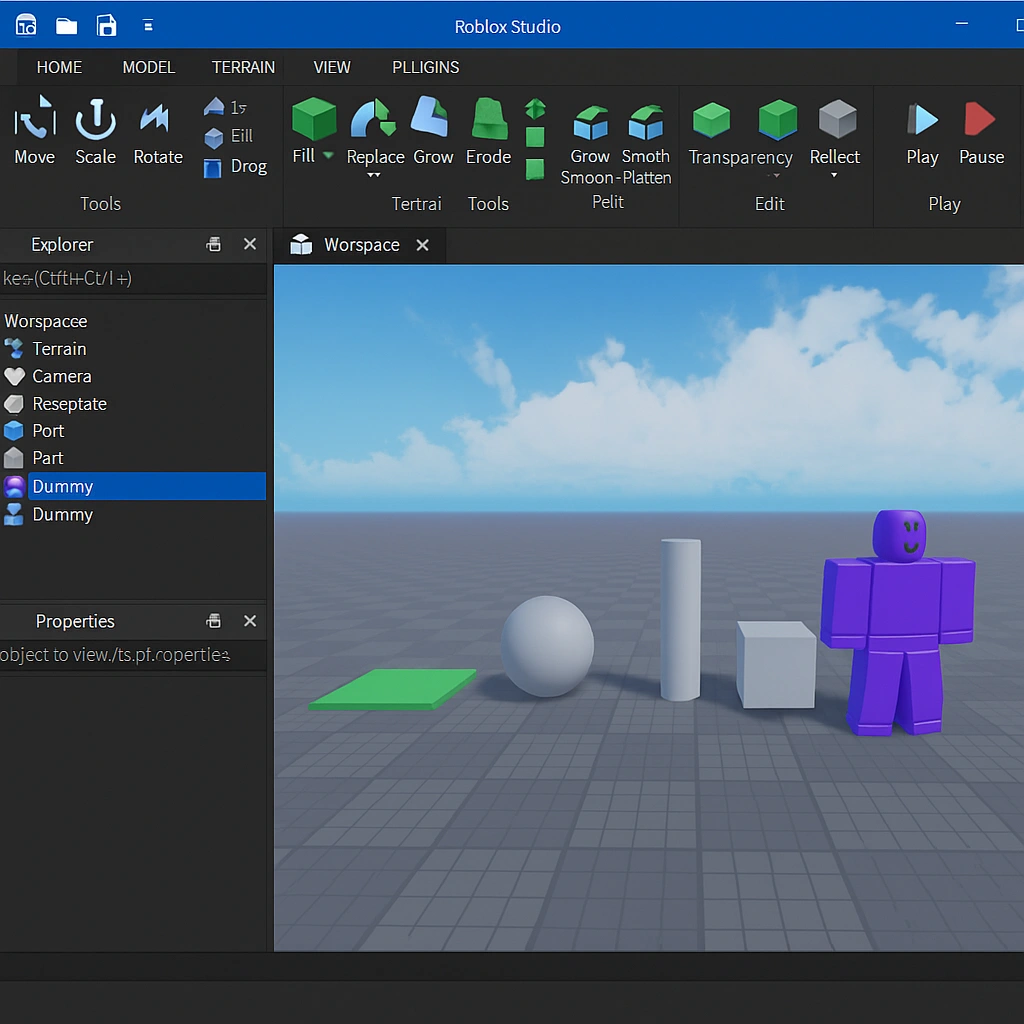
Start by familiarizing yourself with the basic building tools. In the Home tab, you’ll find the Part button. Click it to create different shapes:
- Block: The basic rectangular shape
- Sphere: Perfect for balls or round objects
- Wedge: Great for ramps and slopes
- Cylinder: Useful for pillars and tubes
Essential Building Tools
The four main tools you’ll use constantly are:
- Select Tool: Click to select objects
- Move Tool: Drag objects around your workspace
- Scale Tool: Make objects bigger or smaller
- Rotate Tool: Turn objects in different directions
Enhance your building with advanced tips and tricks.
Organizing Your Work
As your game grows, organization becomes crucial. Use the Explorer window to keep things tidy:
- Create folders to group related objects
- Give your objects meaningful names
- Use the + button next to Workspace to add new folders
For example, if you’re building a house, create a folder called “House” and put all the house parts inside it.
Understanding Roblox Services
Roblox Studio uses a service-based architecture. Here are the key services you need to know:
Workspace: Where all visible 3D objects go
StarterPlayer: Contains settings for how players spawn and behave
StarterGui: Where do you put user interface elements
ServerScriptService: Where you put server-side scripts
ReplicatedStorage: For objects that both server and client need access to
Introduction to Scripting
What is Scripting?
Scripting is how you make your game come alive. Without scripts, your game would just be a collection of static objects. Scripts let you create interactive elements, game mechanics, and responses to player actions.
Roblox uses a programming language called Luau. Don’t worry if you’ve never programmed before – we’ll start with the basics and work our way up.
Types of Scripts
There are three main types of scripts in Roblox:
- Server Scripts: Run on the server and control game logic that affects all players
- Local Scripts: Run on individual players’ devices and handle things like user interfaces
- Module Scripts: Contain reusable code that other scripts can use
Your First Script
Let’s create a simple script that prints a message. Here’s how:
- In the Explorer, find ServerScriptService
- Right-click and select “Script”
- Double-click the script to open it
- Replace the existing code with:
print("Hello, World!") - Press F5 to test your game
Open the Output window (View > Output) and you should see “Hello, World!” printed there.
Basic Scripting Concepts
Variables
Variables are like containers that store information12. In Luau, you create variables like this:
lualocal message = "Welcome to my game!"
local playerHealth = 100
local gameStarted = true
Always use local when creating variables – it’s more efficient and prevents conflicts.
For detailed GUI development techniques, see our comprehensive GUI tutorial.
Functions
Functions are blocks of code that you can run whenever you need them12. They’re like recipes – you write them once and use them many times:
lualocal function welcomePlayer()
    print("Welcome to the game!")
end

welcomePlayer() -- This runs the function
Events
Events are what make games interactive12. They trigger when something happens, like when a player touches a part:
lualocal part = workspace.Part -- Reference to a part in your game

part.Touched:Connect(function(hit)
    print("Something touched the part!")
end)
Intermediate Scripting Techniques
Working with Parts and Models
You can change the properties of parts through scripting:
lualocal part = workspace.Part
part.Color = Color3.new(1, 0, 0) -- Makes the part red
part.Size = Vector3.new(4, 4, 4) -- Makes it bigger
part.Transparency = 0.5 -- Makes it semi-transparent
Creating Interactive Objects
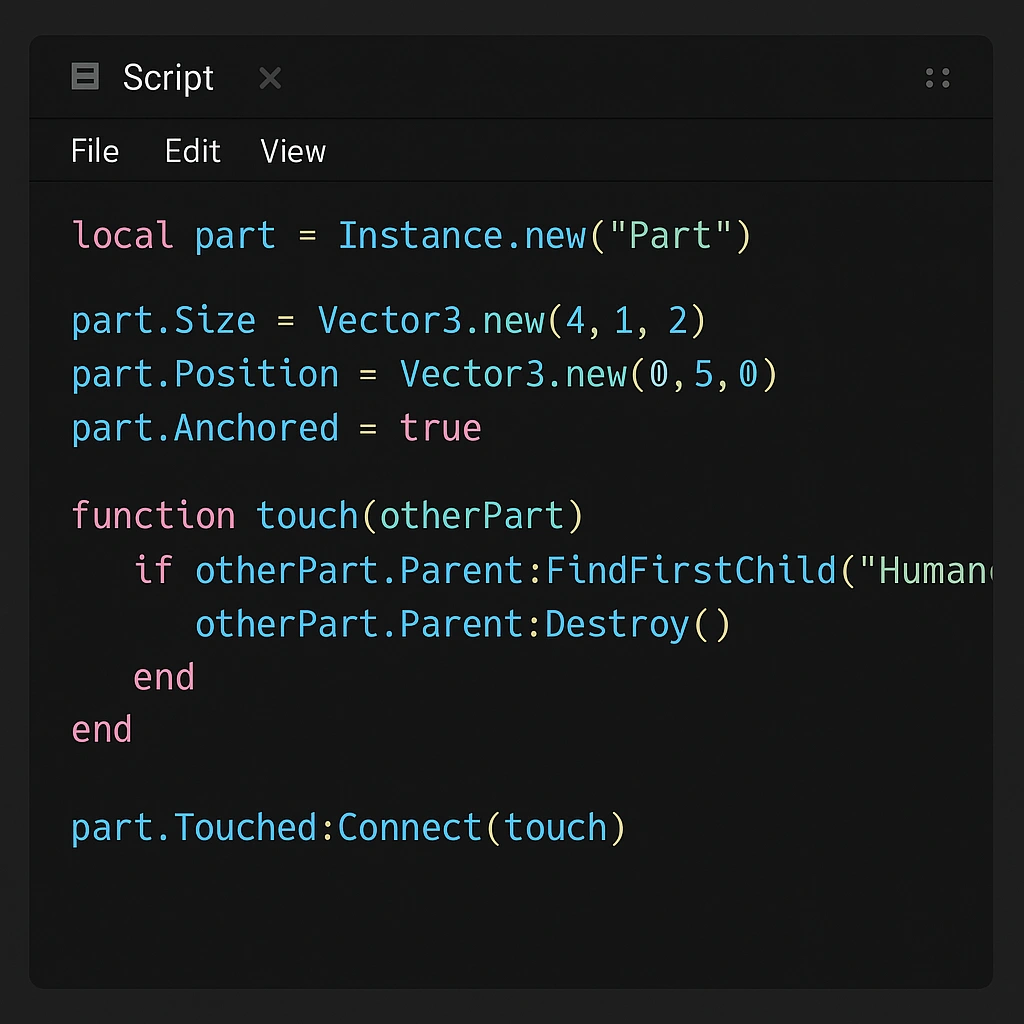
Here’s how to make a part that disappears when touched:
lualocal part = workspace.DisappearingPart

part.Touched:Connect(function(hit)
    local humanoid = hit.Parent:FindFirstChild("Humanoid")
    if humanoid then -- This means a player touched it
        part.Transparency = 1 -- Make invisible
        part.CanCollide = false -- Players can walk through it

        wait(3) -- Wait 3 seconds

        part.Transparency = 0 -- Make visible again
        part.CanCollide = true -- Make solid again
    end
end)
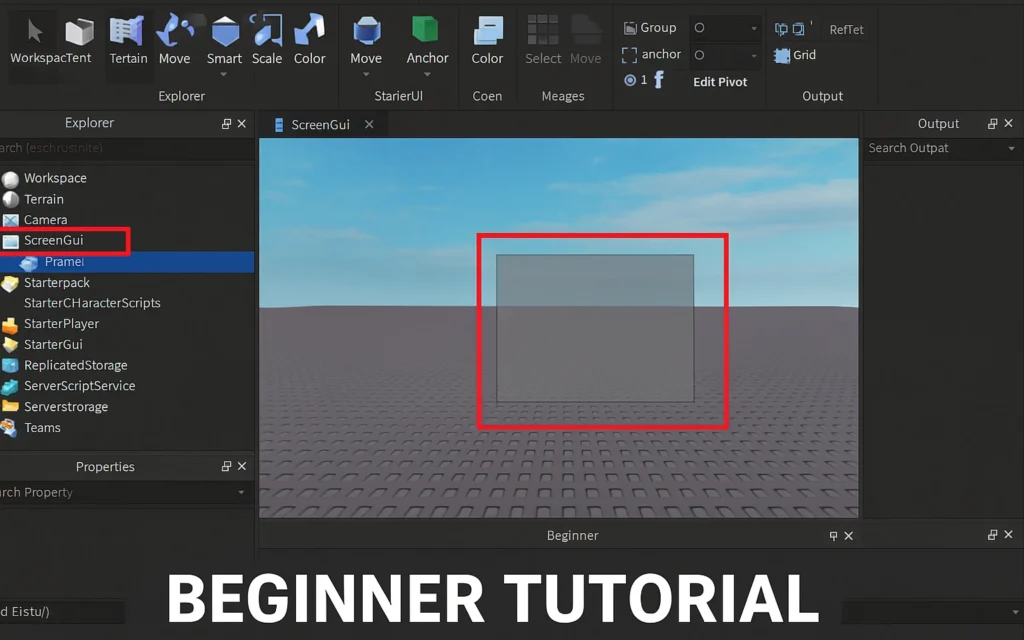
User Interface Creation
Creating user interfaces (GUIs) is essential for most games. Here’s a basic example:
lualocal screenGui = Instance.new("ScreenGui")
screenGui.Parent = game.Players.LocalPlayer:WaitForChild("PlayerGui")

local frame = Instance.new("Frame")
frame.Size = UDim2.new(0, 200, 0, 100)
frame.Position = UDim2.new(0.5, -100, 0.5, -50)
frame.BackgroundColor3 = Color3.new(0, 0, 1)
frame.Parent = screenGui

local textLabel = Instance.new("TextLabel")
textLabel.Size = UDim2.new(1, 0, 1, 0)
textLabel.Text = "Welcome!"
textLabel.TextColor3 = Color3.new(1, 1, 1)
textLabel.BackgroundTransparency = 1
textLabel.Parent = frame
Advanced Scripting Concepts
Object-Oriented Programming
As your scripts get more complex, you’ll want to use better organization methods. Object-oriented programming helps you create reusable code structures:
lualocal PlayerManager = {}
PlayerManager.__index = PlayerManager

function PlayerManager.new(player)
    local self = setmetatable({}, PlayerManager)
    self.player = player
    self.score = 0
    self.level = 1
    return self
end

function PlayerManager:addScore(points)
    self.score = self.score + points
    if self.score >= 100 then
        self:levelUp()
    end
end

function PlayerManager:levelUp()
    self.level = self.level + 1
    self.score = 0
    print(self.player.Name .. " leveled up to level " .. self.level)
end

return PlayerManager
Remote Events and Functions
When you need your server scripts and local scripts to communicate, you use RemoteEvents and RemoteFunctions:
lua-- Server script
local ReplicatedStorage = game:GetService("ReplicatedStorage")
local remoteEvent = Instance.new("RemoteEvent")
remoteEvent.Name = "PlayerJoined"
remoteEvent.Parent = ReplicatedStorage

game.Players.PlayerAdded:Connect(function(player)
    remoteEvent:FireClient(player, "Welcome to the game!")
end)

-- Local script
local ReplicatedStorage = game:GetService("ReplicatedStorage")
local remoteEvent = ReplicatedStorage:WaitForChild("PlayerJoined")

remoteEvent.OnClientEvent:Connect(function(message)
    print(message)
end)
Data Persistence
To save player data between game sessions, you’ll use DataStoreService:
lualocal DataStoreService = game:GetService("DataStoreService")
local playerData = DataStoreService:GetDataStore("PlayerData")

game.Players.PlayerAdded:Connect(function(player)
    local leaderstats = Instance.new("Folder")
    leaderstats.Name = "leaderstats"
    leaderstats.Parent = player

    local coins = Instance.new("IntValue")
    coins.Name = "Coins"
    coins.Parent = leaderstats

    -- Load player data
    local success, data = pcall(function()
        return playerData:GetAsync(player.UserId)
    end)

    if success and data then
        coins.Value = data.coins or 0
    end
end)

game.Players.PlayerRemoving:Connect(function(player)
    local success, error = pcall(function()
        playerData:SetAsync(player.UserId, {
            coins = player.leaderstats.Coins.Value
        })
    end)
end)
Best Practices and Tips
Code Organization
Keep your code clean and organized:
- Use meaningful variable names
- Comment your code to explain what it does
- Break large scripts into smaller, focused modules
- Use proper indentation
Performance Optimization
- Use
localvariables whenever possible - Avoid creating objects in loops
- Use
wait()ortask.wait()to prevent infinite loops from crashing your game - Clean up connections and objects when they’re no longer needed
Optimize game performance with our FPS boosting guide.
Testing and Debugging
- Always test your games regularly using the Play button
- Use the Output window to debug your scripts
- Use
print()statements to track what your code is doing - Test with multiple players using the “Players” dropdown in the Test tab
Community Resources
The Roblox development community is incredibly helpful. Here are some valuable resources:
- Roblox Developer Hub: Official documentation and tutorials
- Roblox Developer Forum: Community discussions and help
- YouTube Tutorials: Visual learning resources
- Discord Communities: Real-time help and collaboration
Protect your developer account with two-step verification setup.
Publishing Your Game
Preparing for Release
Before publishing your game:
- Test thoroughly for bugs and glitches
- Optimize performance for different devices
- Create appealing thumbnails and descriptions
- Set up proper game settings and permissions
Monetization Options
Roblox offers several ways to earn money from your games:
- Game Passes: One-time purchases for special features
- Developer Products: Consumable items players can buy repeatedly
- Premium Subscriptions: Monthly recurring revenue
- Advertising Revenue: Earn from ads shown to players
In 2024, Roblox paid out $923 million to creators, with some developers earning over $50 million.
Explore advanced earning strategies in our Robux economy guide and monetization comparison
Staying Current
The Roblox platform constantly evolves. Stay updated by:
- Following Roblox’s official announcements
- Participating in the developer community
- Attending Roblox Developer Conference (RDC)
- Experimenting with new features as they’re released
Recent developments include enhanced AI tools for creation, improved party systems for multiplayer experiences, and expanded monetization options.
Conclusion
Mastering Roblox Studio is a journey that requires patience, practice, and creativity. Start with simple projects and gradually work your way up to more complex games. Remember that every expert was once a beginner, and the key to success is consistent practice and learning from the community.
The platform offers incredible opportunities for creative expression and even financial success. With over 79.5 million daily users and a thriving creator economy, there’s never been a better time to start your Roblox development journey.
Keep experimenting, stay curious, and most importantly, have fun creating. The next viral Roblox game could be yours!
FAQ
Q: Do I need to know programming to use Roblox Studio?
A: No, you can start building games without programming knowledge. However, learning to script will unlock much more creative potential and allow you to create truly interactive experiences.
Q: How long does it take to learn Roblox Studio?
A: You can create basic games within a few hours of learning. However, mastering advanced scripting and game design principles can take months or years of dedicated practice.
Q: Can I make money from Roblox games?
A: Yes! Roblox has a robust creator economy. In 2024, creators earned over $923 million through various monetization methods. Success requires creating engaging games that attract and retain players.
Q: What’s the difference between Lua and Luau?
A: Luau is Roblox’s enhanced version of Lua 5.1. It includes performance improvements, type checking, and additional features specifically designed for game development.
Q: Is Roblox Studio free to use?
A: Yes, Roblox Studio is completely free to download and use. You can create, test, and publish games without any cost. Revenue sharing only applies when you start earning money from your games.
Q: Can I work on Roblox games with a team?
A: Yes, Roblox Studio supports collaborative development. You can work with others through Team Create, allowing multiple developers to work on the same project simultaneously.
Q: What devices can run Roblox games?
A: Roblox games can run on PC, Mac, mobile devices (iOS and Android), Xbox One, and VR headsets. When developing, consider optimizing for different device capabilities.
Q: How do I get help if I’m stuck?
A: The Roblox Developer Forum is an excellent resource for getting help from experienced developers. You can also find tutorials on YouTube, official documentation on the Roblox Creator Hub, and join Discord communities focused on Roblox development.
Pingback: Build Your First GUI in Roblox Studio: ScreenGui & Frame Essentials - robloxtutor